Adding a Bank Account
Download the job aid (.PDF, 1.07 MB) or follow the steps below.
If you have questions, please contact us at ORAUAccountsPayable@orau.org.
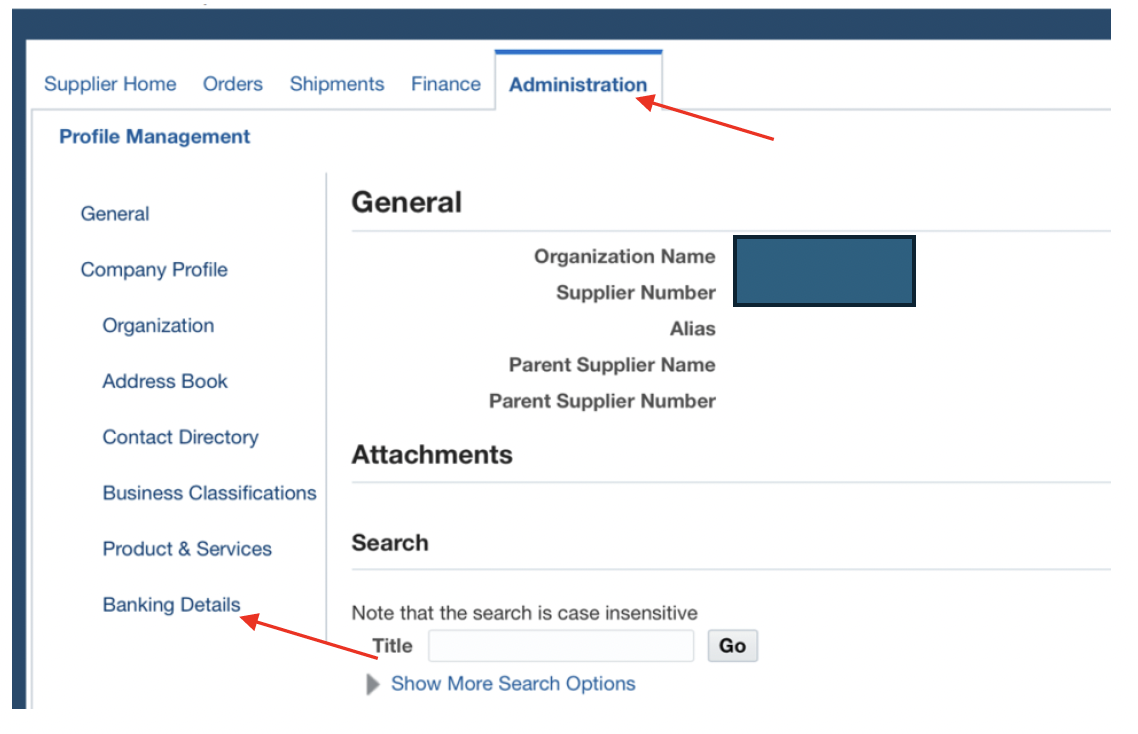
Step 1: Click the ‘Administration’ tab, then click ‘Banking Details.’
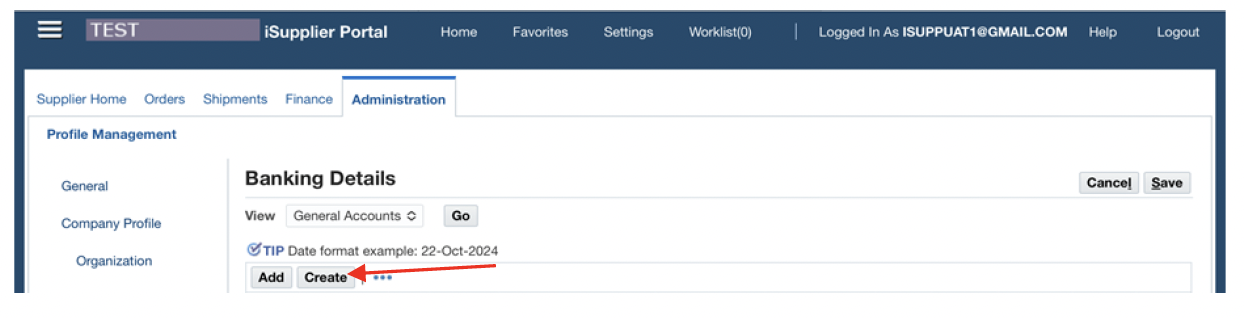
Step 2: Click the ‘Create’ button.
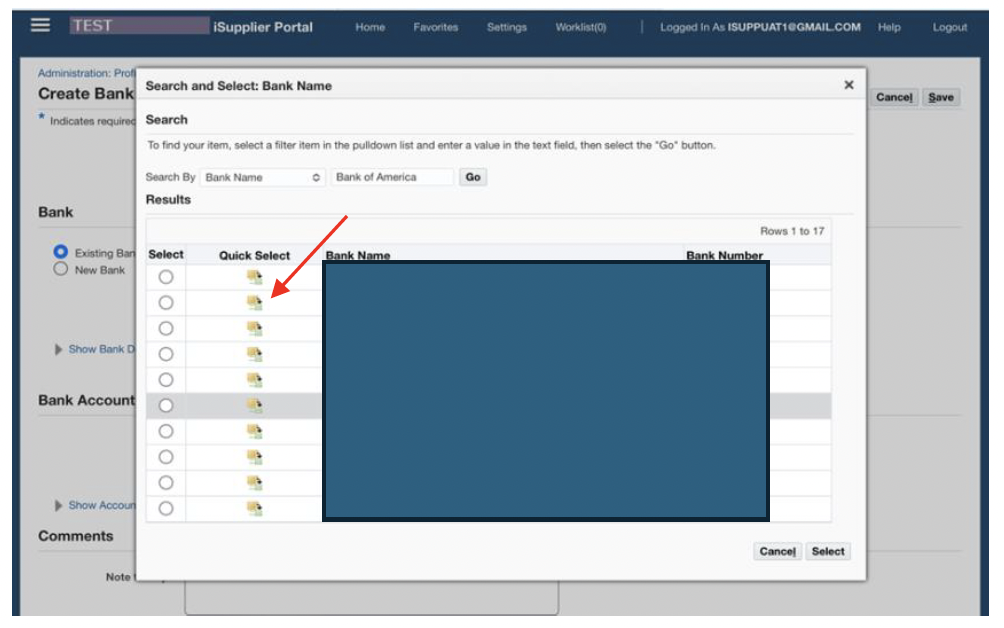
Step 3: Click ‘Existing Bank,’ then click the magnifying glass by ‘Bank Name’ and enter your bank name in the box that appears. Then click ‘Go.’
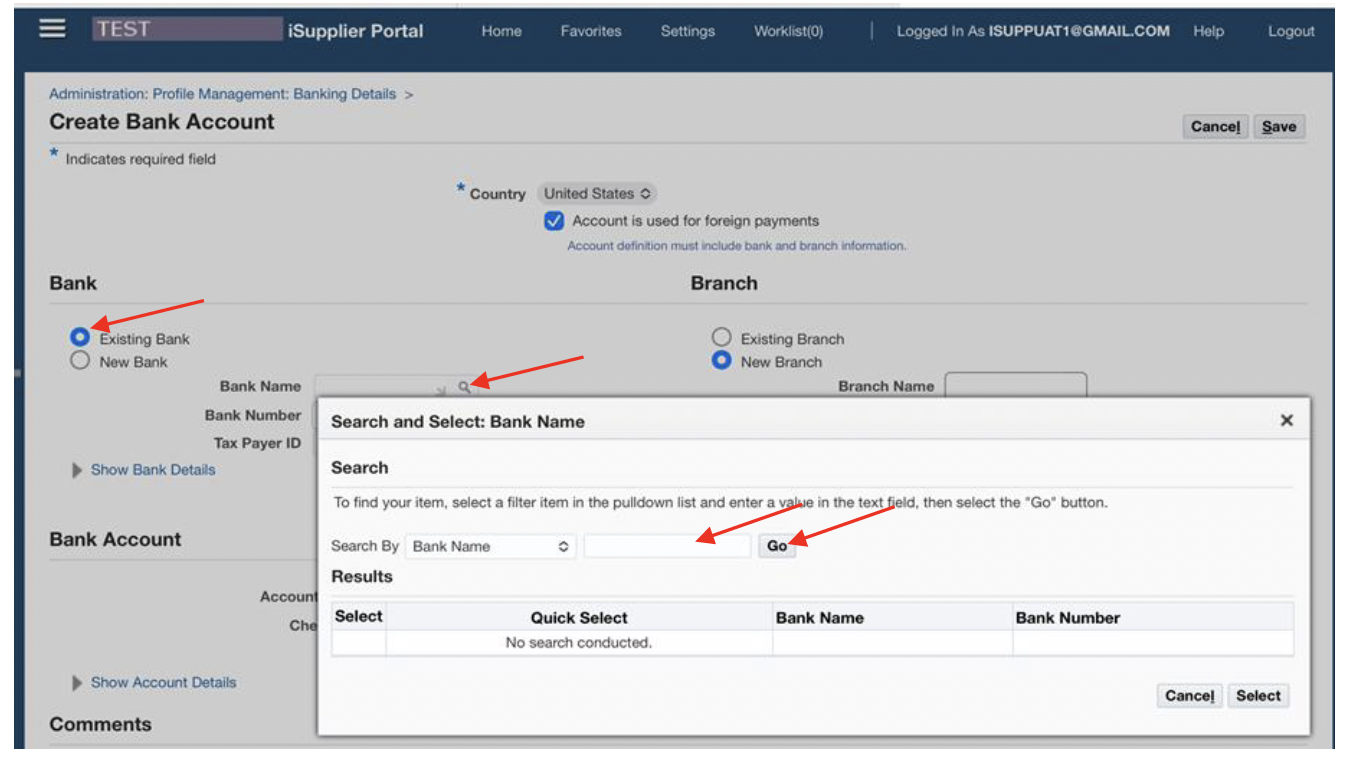
Step 4: Click the ‘Quick Select’ button next to your bank name.
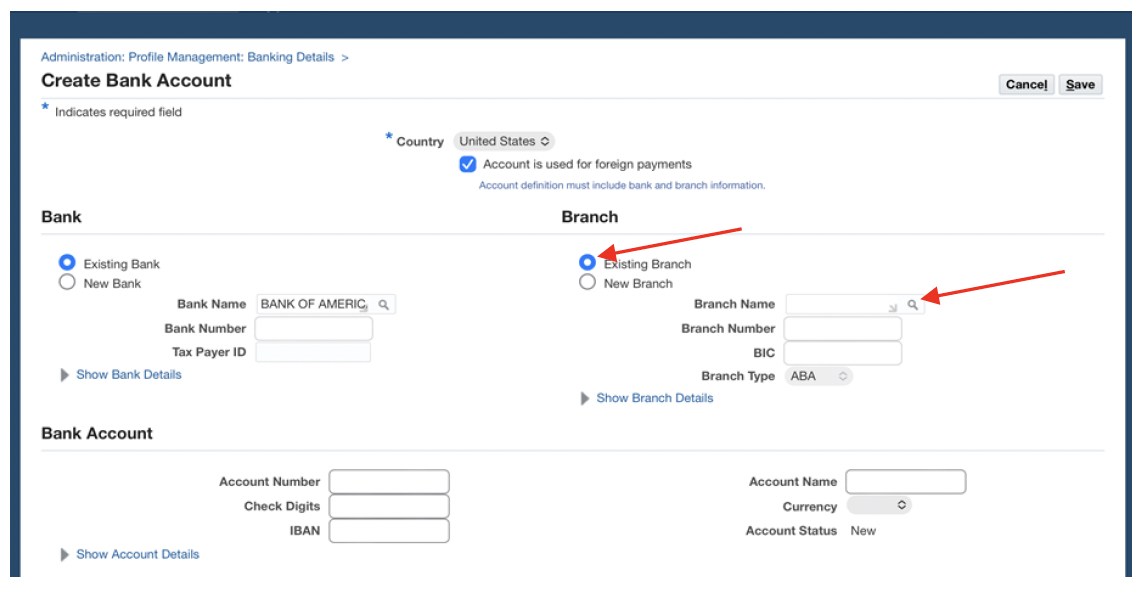
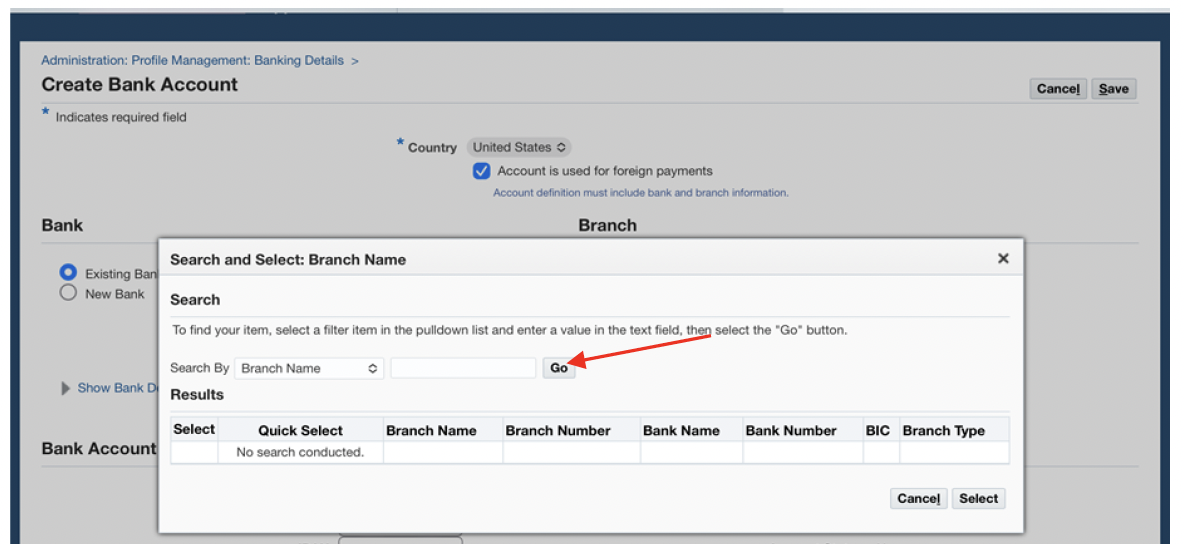
Step 5: Click ‘Existing Branch’ button, then click the magnifying glass by ‘Branch Name’ and enter your ABA routing number.
Step 6: Click ‘Go.’
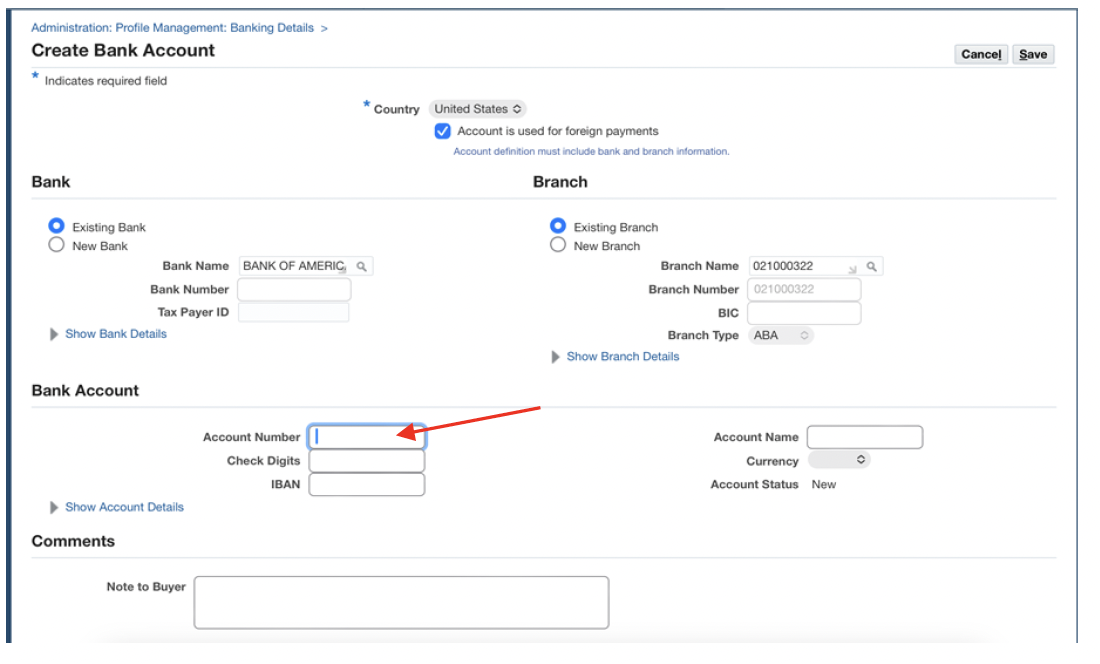
Step 7: Click the ‘Quick Select’ button next to your branch (routing) number.

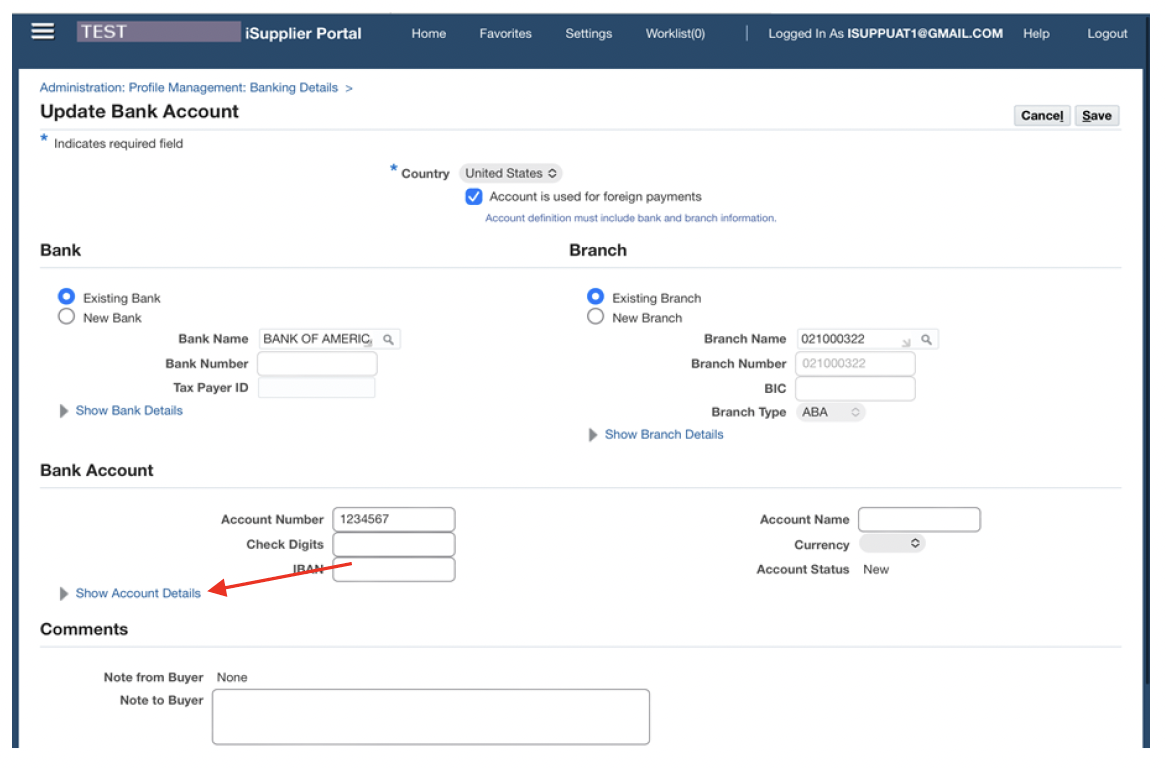
Step 8: Enter account number.
Step 9: Click ‘Show Account Details.’
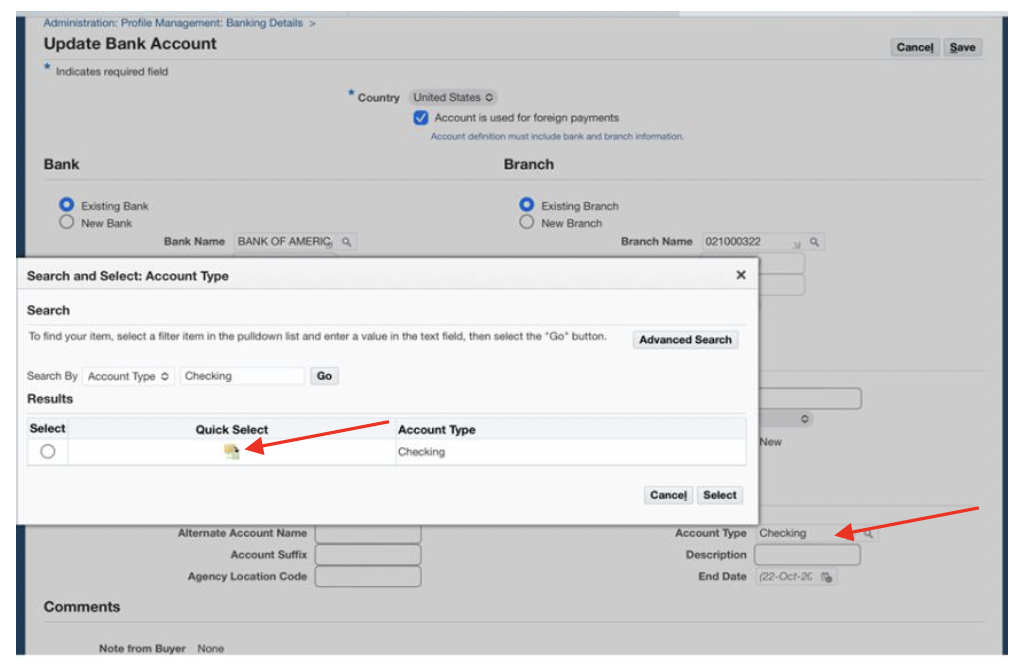
Step 10: Enter ‘Account Type’ as either checking or savings, then click ‘Enter, then click the ‘Quick Select’ button.
Step 11: Click the ‘Save’ button.

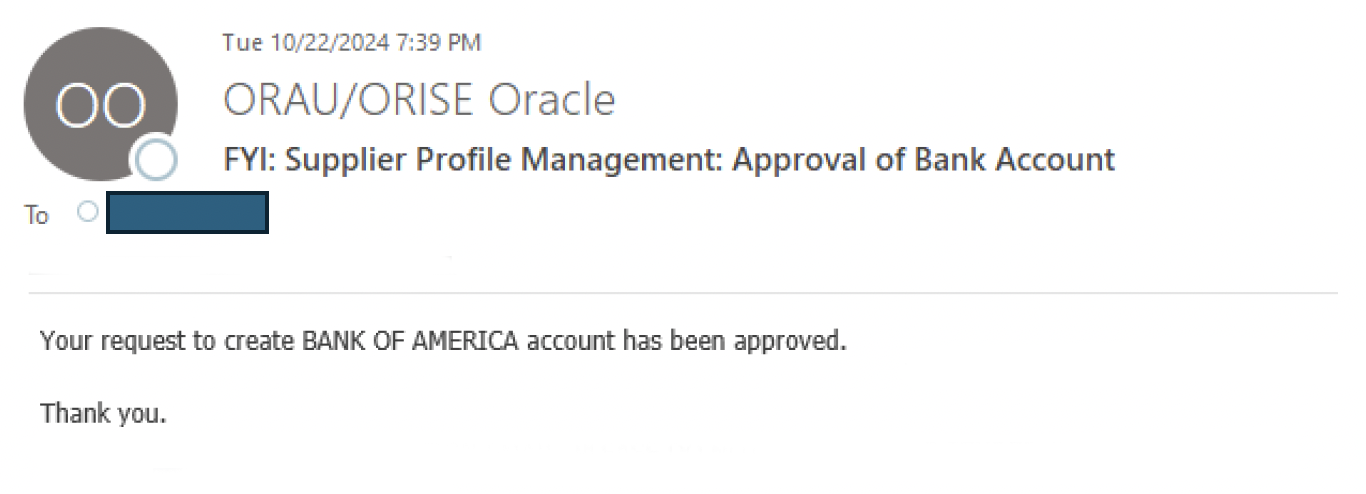
Step 12: You’ll receive a confirmation message.

Step 13: Once approved, you’ll receive a confirmation email.