Create Invoicing Match to Purchase Order

Download the job aid (.PDF, 611 KB) or follow the steps below.

If you have questions, please contact us at ORAUAccountsPayable@orau.org.

Step 1: Once logged into the Okta app, click ‘Finance.’

Once logged into the Okta app, click ‘Finance.’

Step 2: Click ‘Go.’

Click ‘Go.’

Step 3: Enter ‘Purchase Order Number,’ then click ‘Go.’
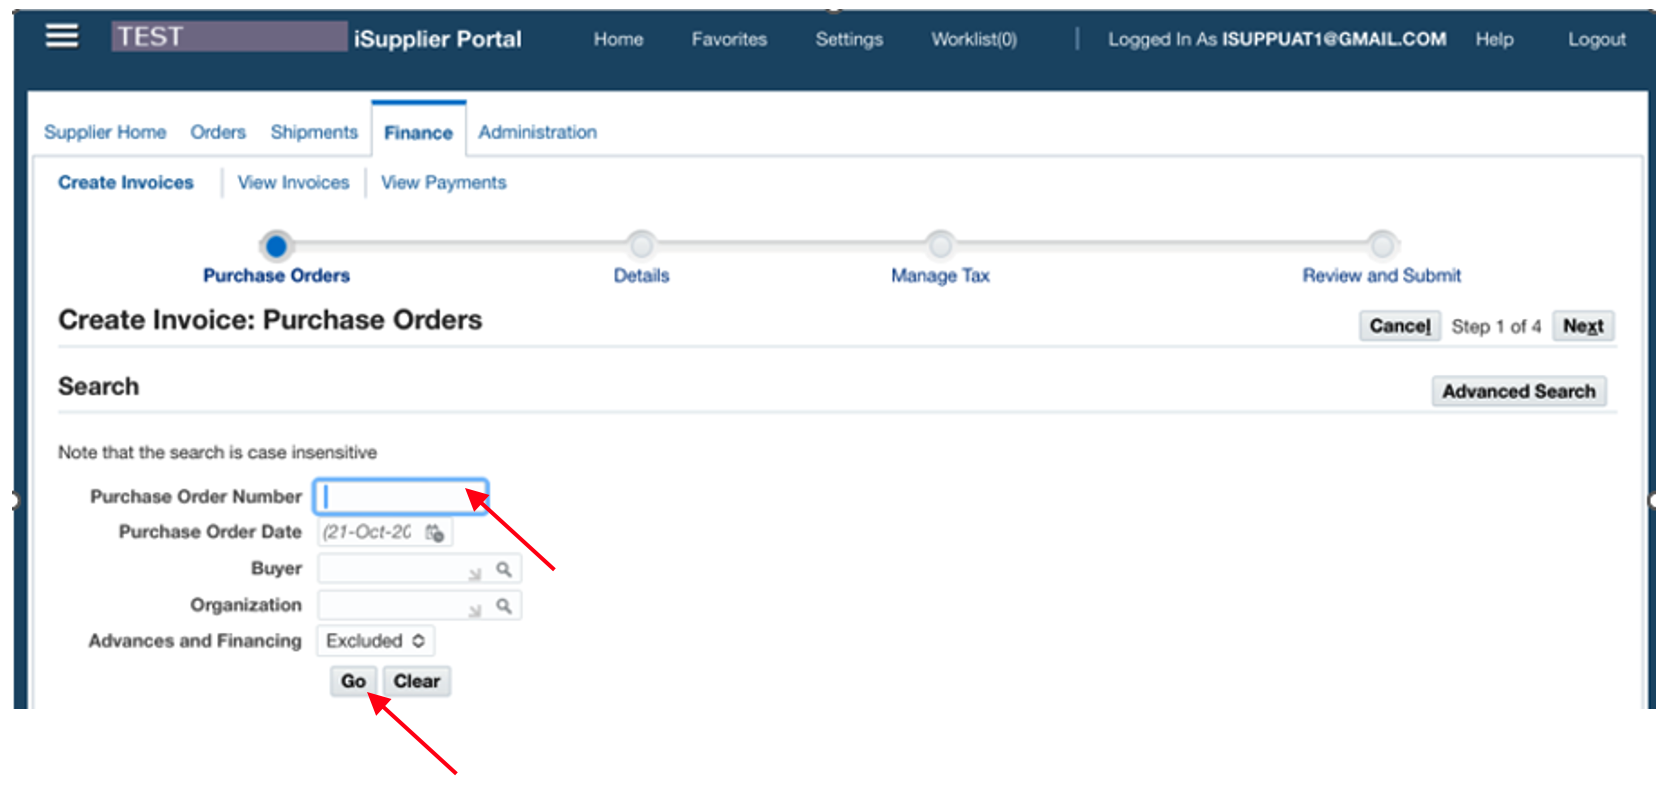
Enter ‘Purchase Order Number’ then click ‘Go.’

Step 4: Check the box next to the PO line(s) you are to bill against.

Check the box next to the PO line(s) you are to bill against.

Step 5: Click ‘Next.’

Click ‘Next.’

Step 6: Ensure ‘Remit To’ is ‘ISUPPLIER.’ If not, click on magnifying glass to choose ‘ISUPPLIER.’
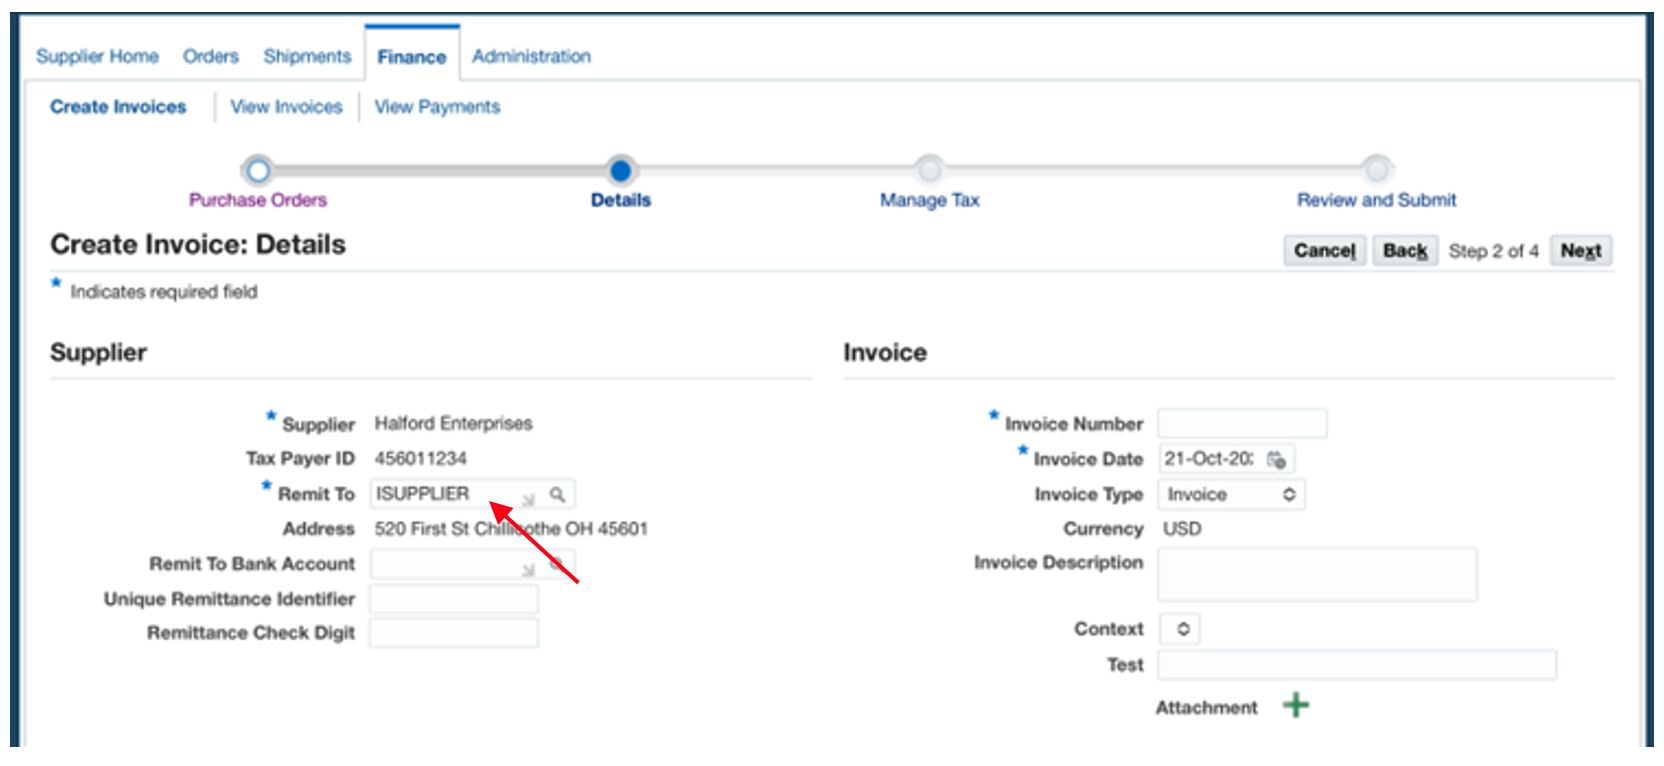
Ensure ‘Remit To’ is ‘ISUPPLIER.’ If not click on magnifying glass to choose ‘ISUPPLIER.’

Step 7: Enter invoice number and enter the purchase order # in ‘Invoice Description.’
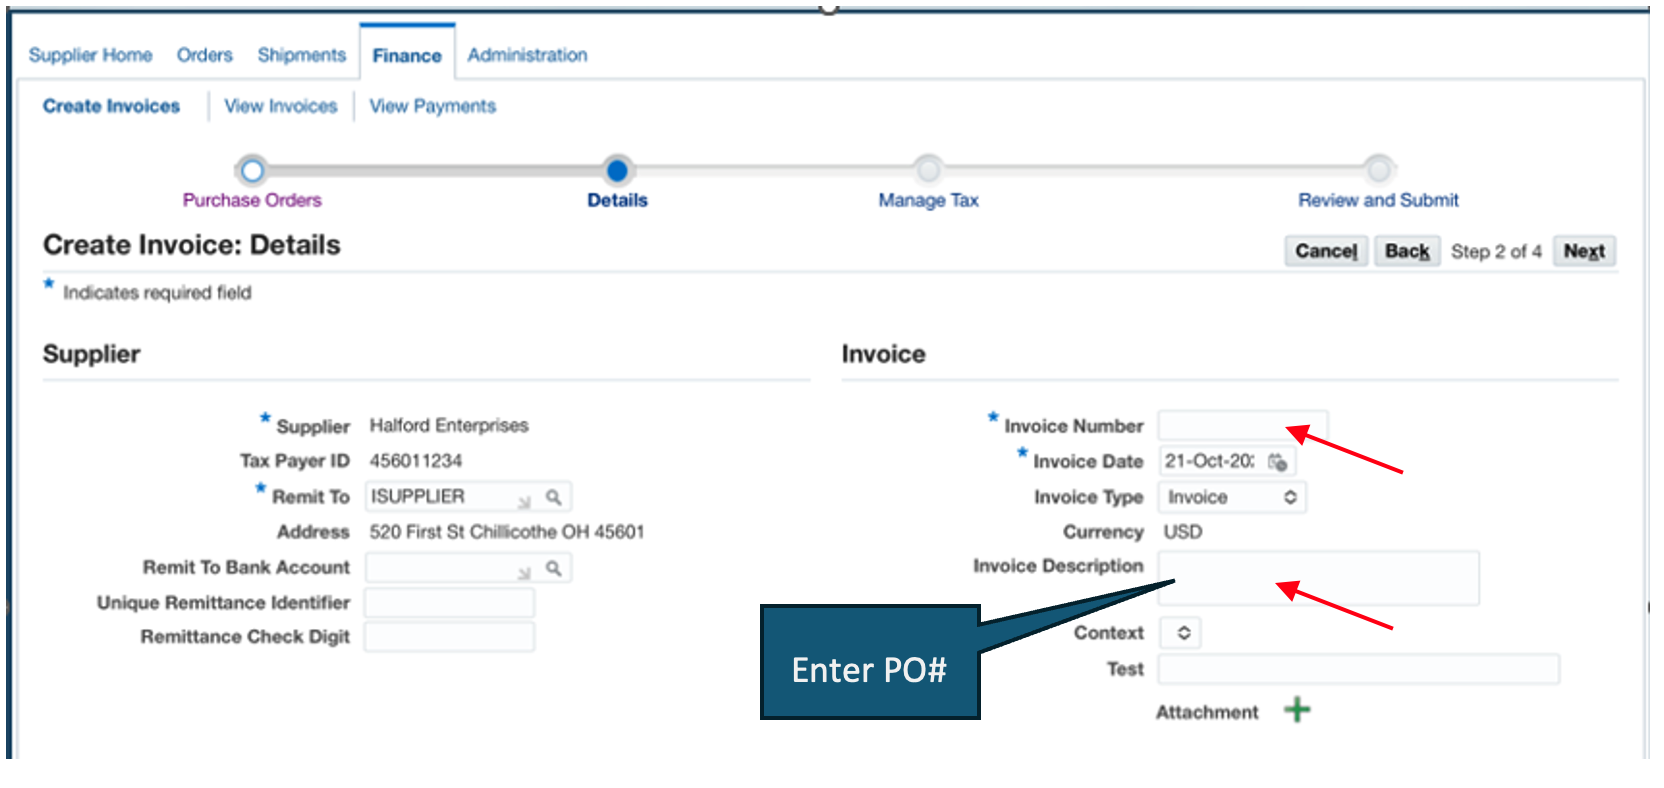
Enter Invoice Number and enter the Purchase Order # in ‘Invoice Description.’

Step 8: Click on the plus sign by ‘Attachment’ and add a PDF of your invoice and any pertinent backup.
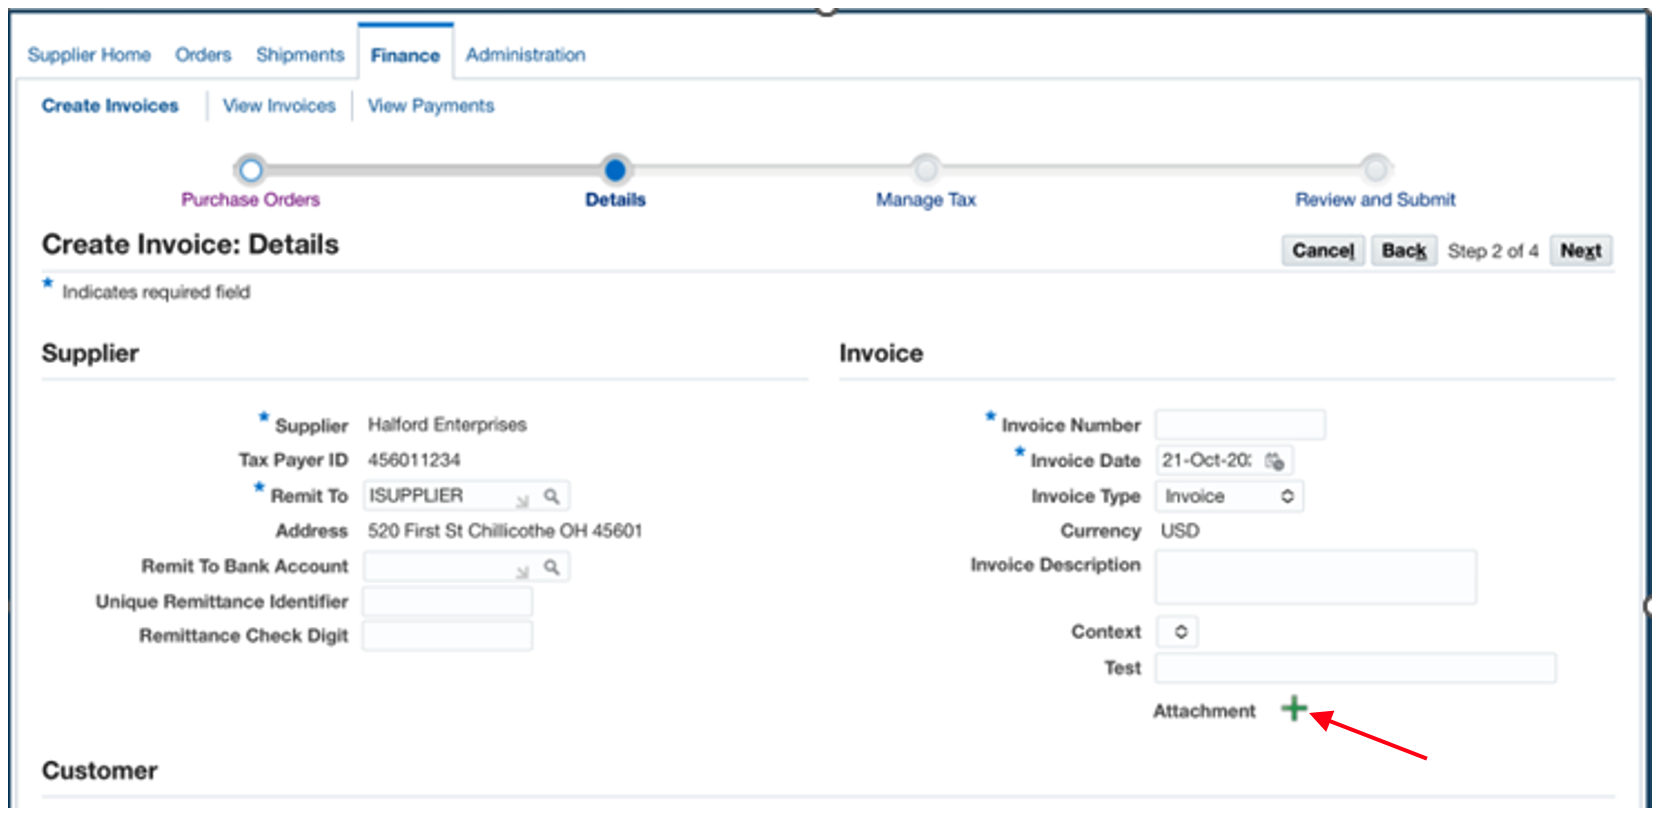
Click on the plus sign by ‘Attachment’ and add a pdf of your invoice and any pertinent backup.

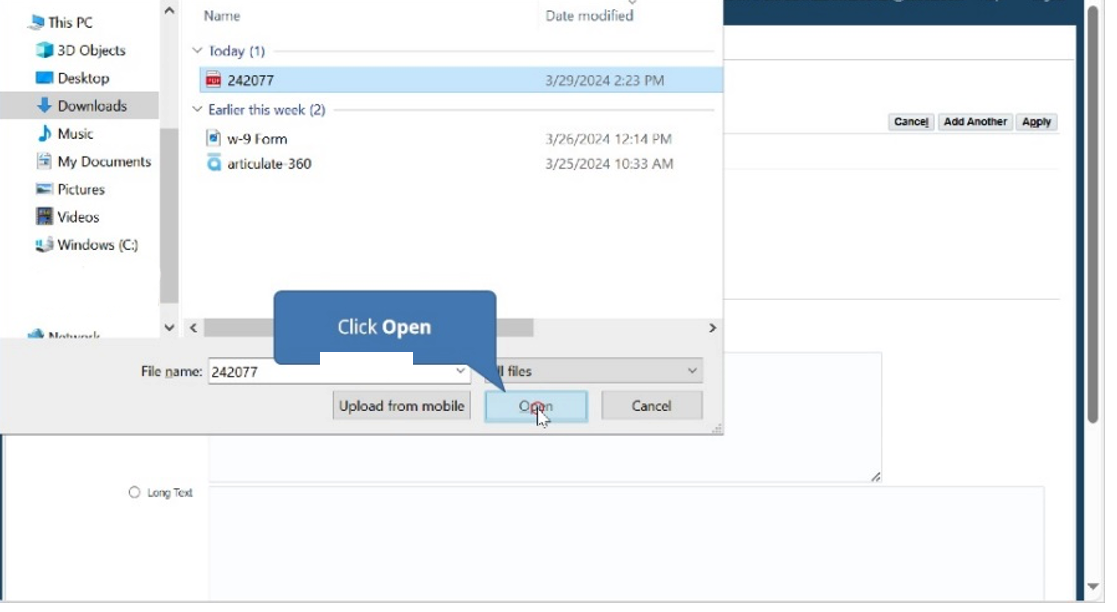
Step 9: Click the ‘Choose File’ button.
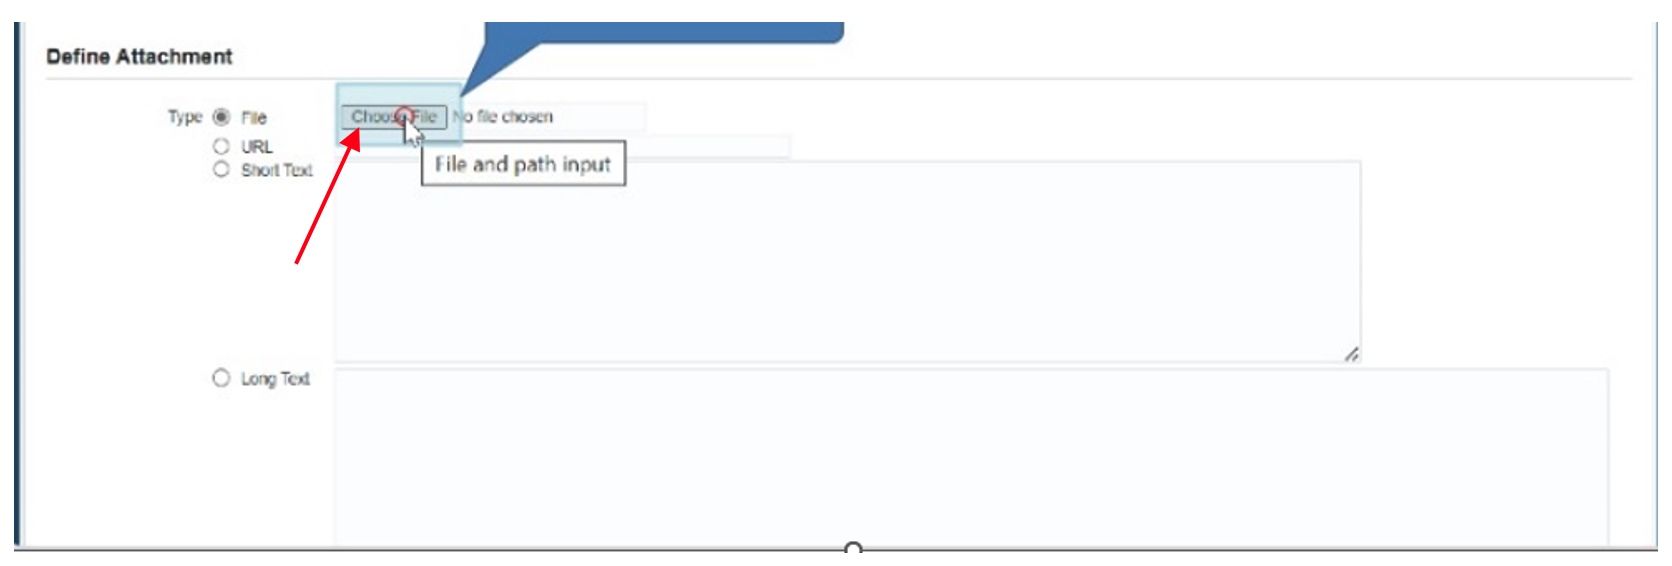
Click the ‘Choose File’ button.

Step 10: Select the attachment.
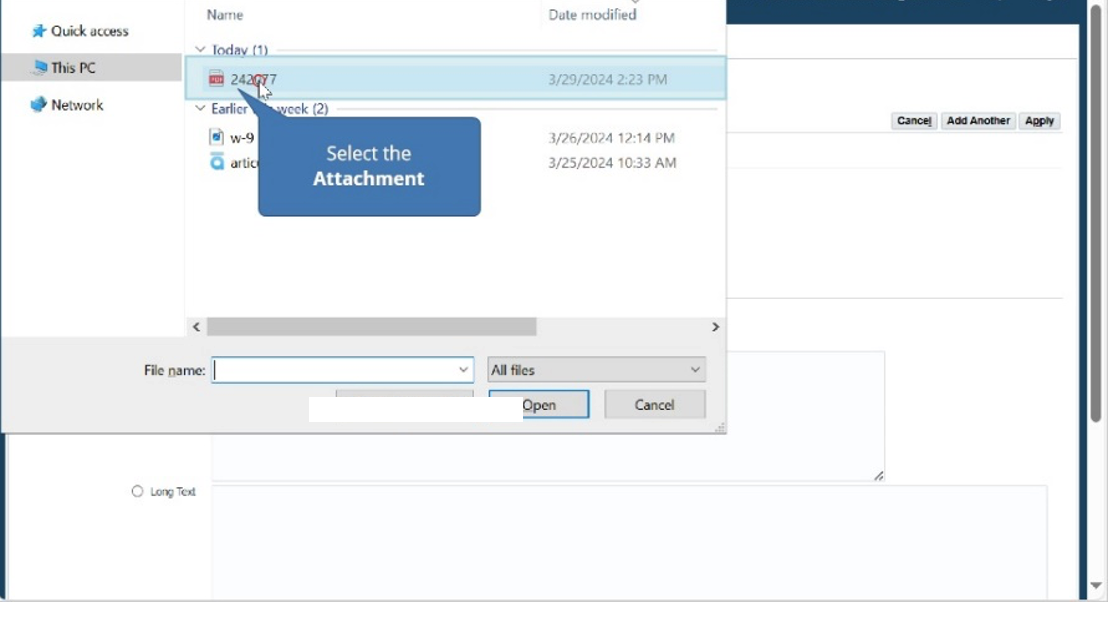
Select the Attachment.

Step 11: Click ‘Open.’

Click ‘Open.’

Step 12: Click ‘Apply.’
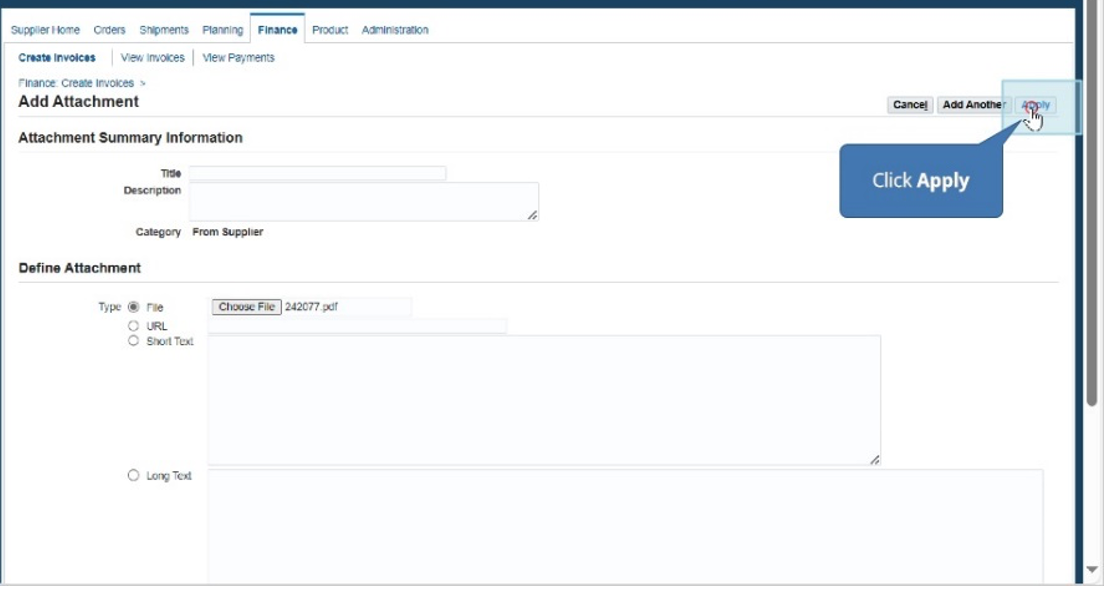
Click ‘Apply.’

Step 13: Scroll down to the Items section and update the quantity, if needed.

Scroll down to the Items Sections, and update the quantity, if needed.

Step 14: Click ‘Next.’

Click ‘Next.’

Step 15: Verify your information and either click ‘Back’ to make corrections or click ‘Submit.’

Verify your information and either click ‘Back’ to make corrections or Click ‘Submit.’

Impact Areas

Contact us

For information about iSupplier, contact ORAU Accounts Payable at ORAUAccountsPayable@orau.org.